
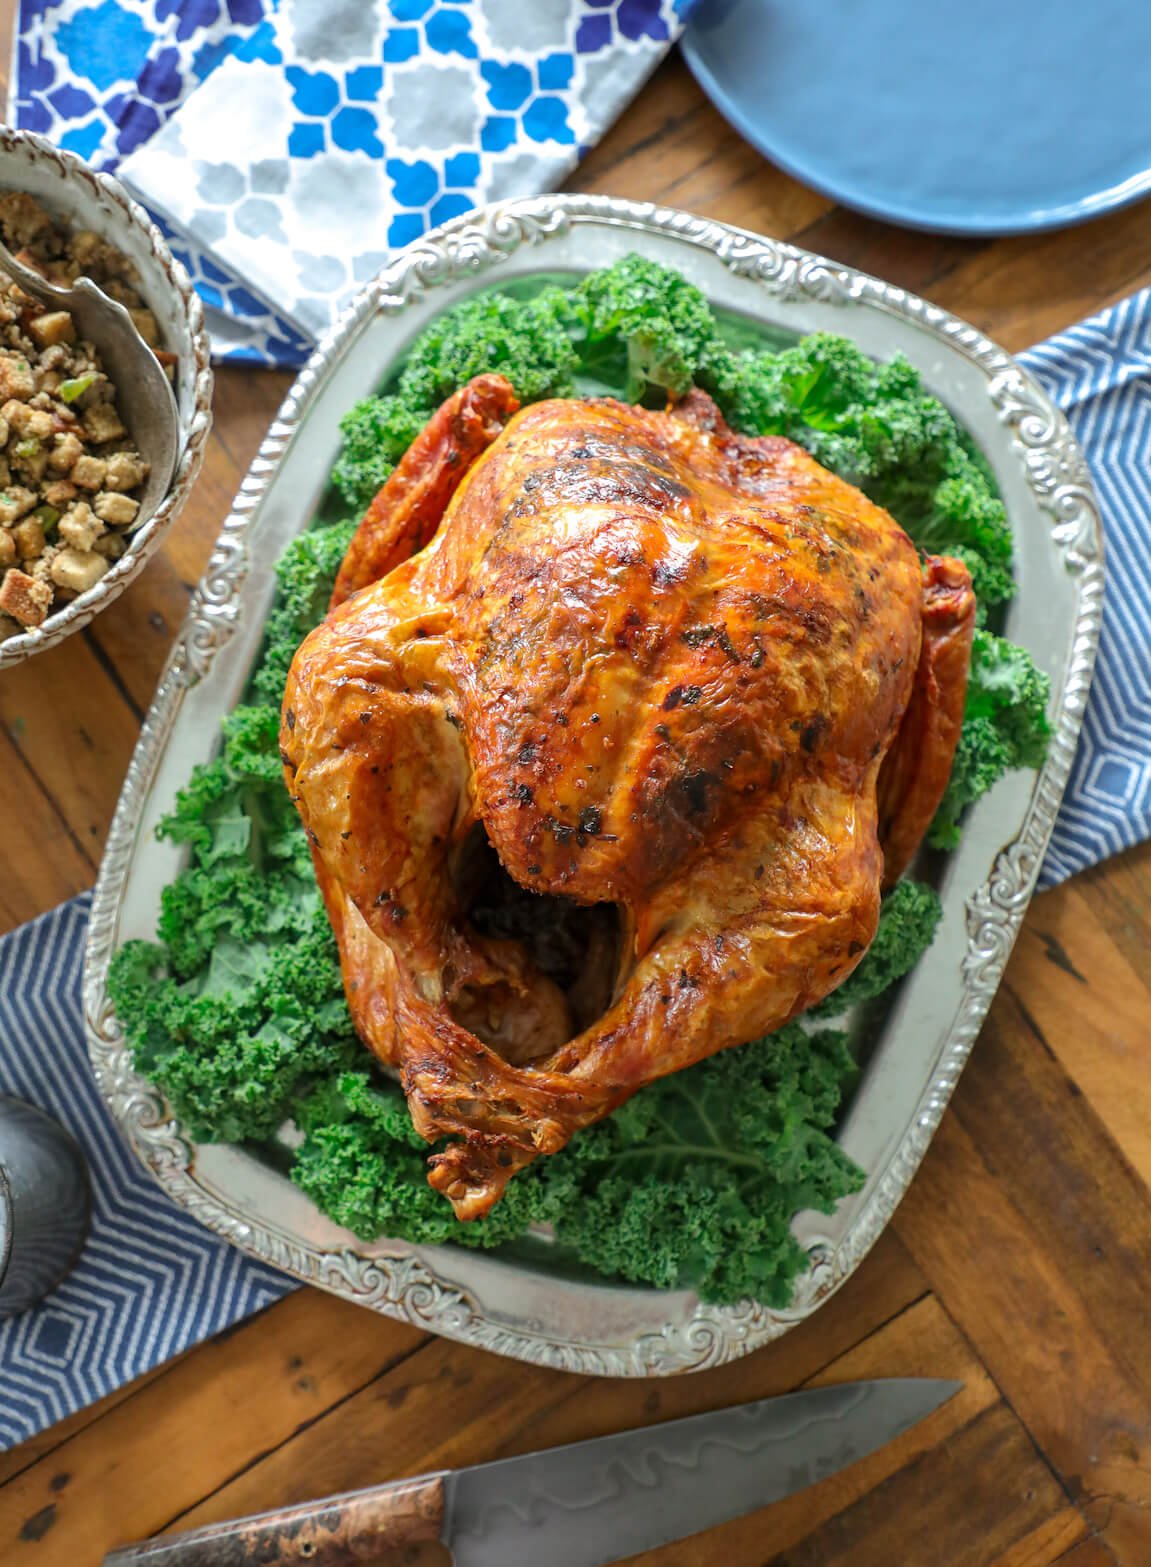
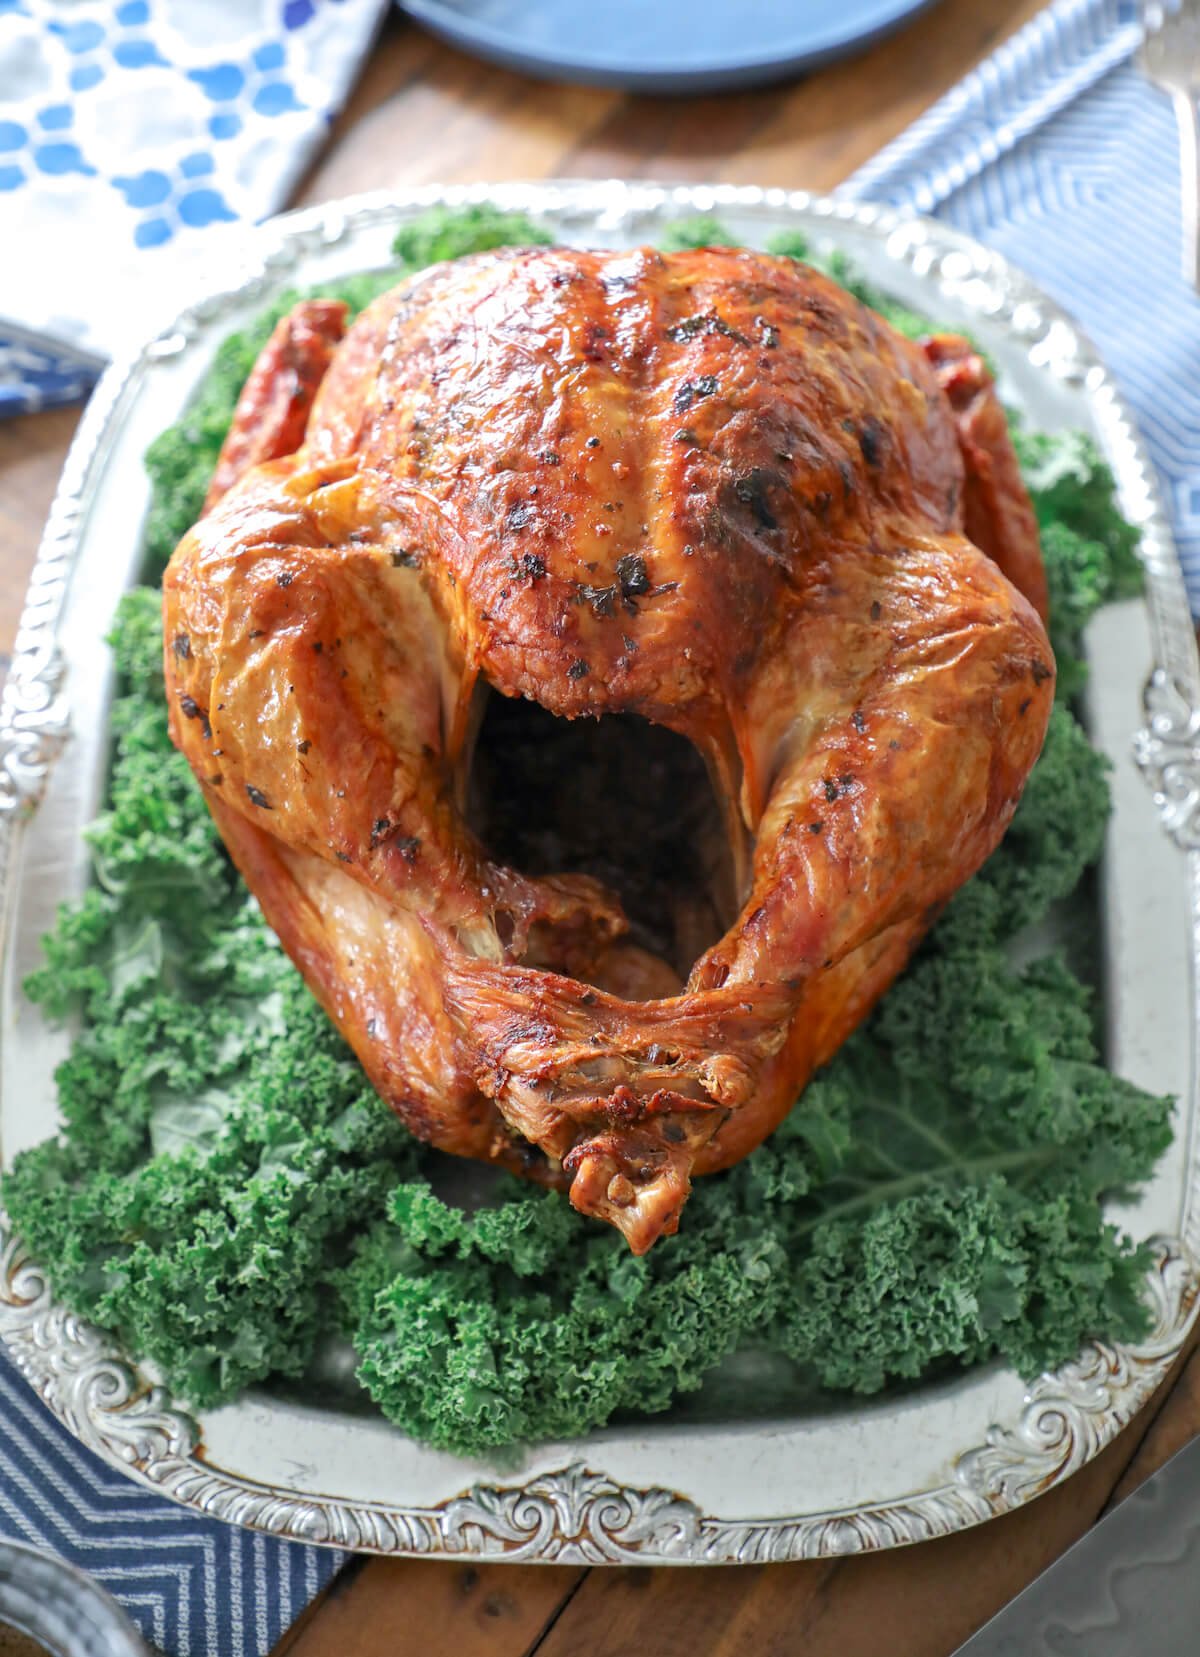
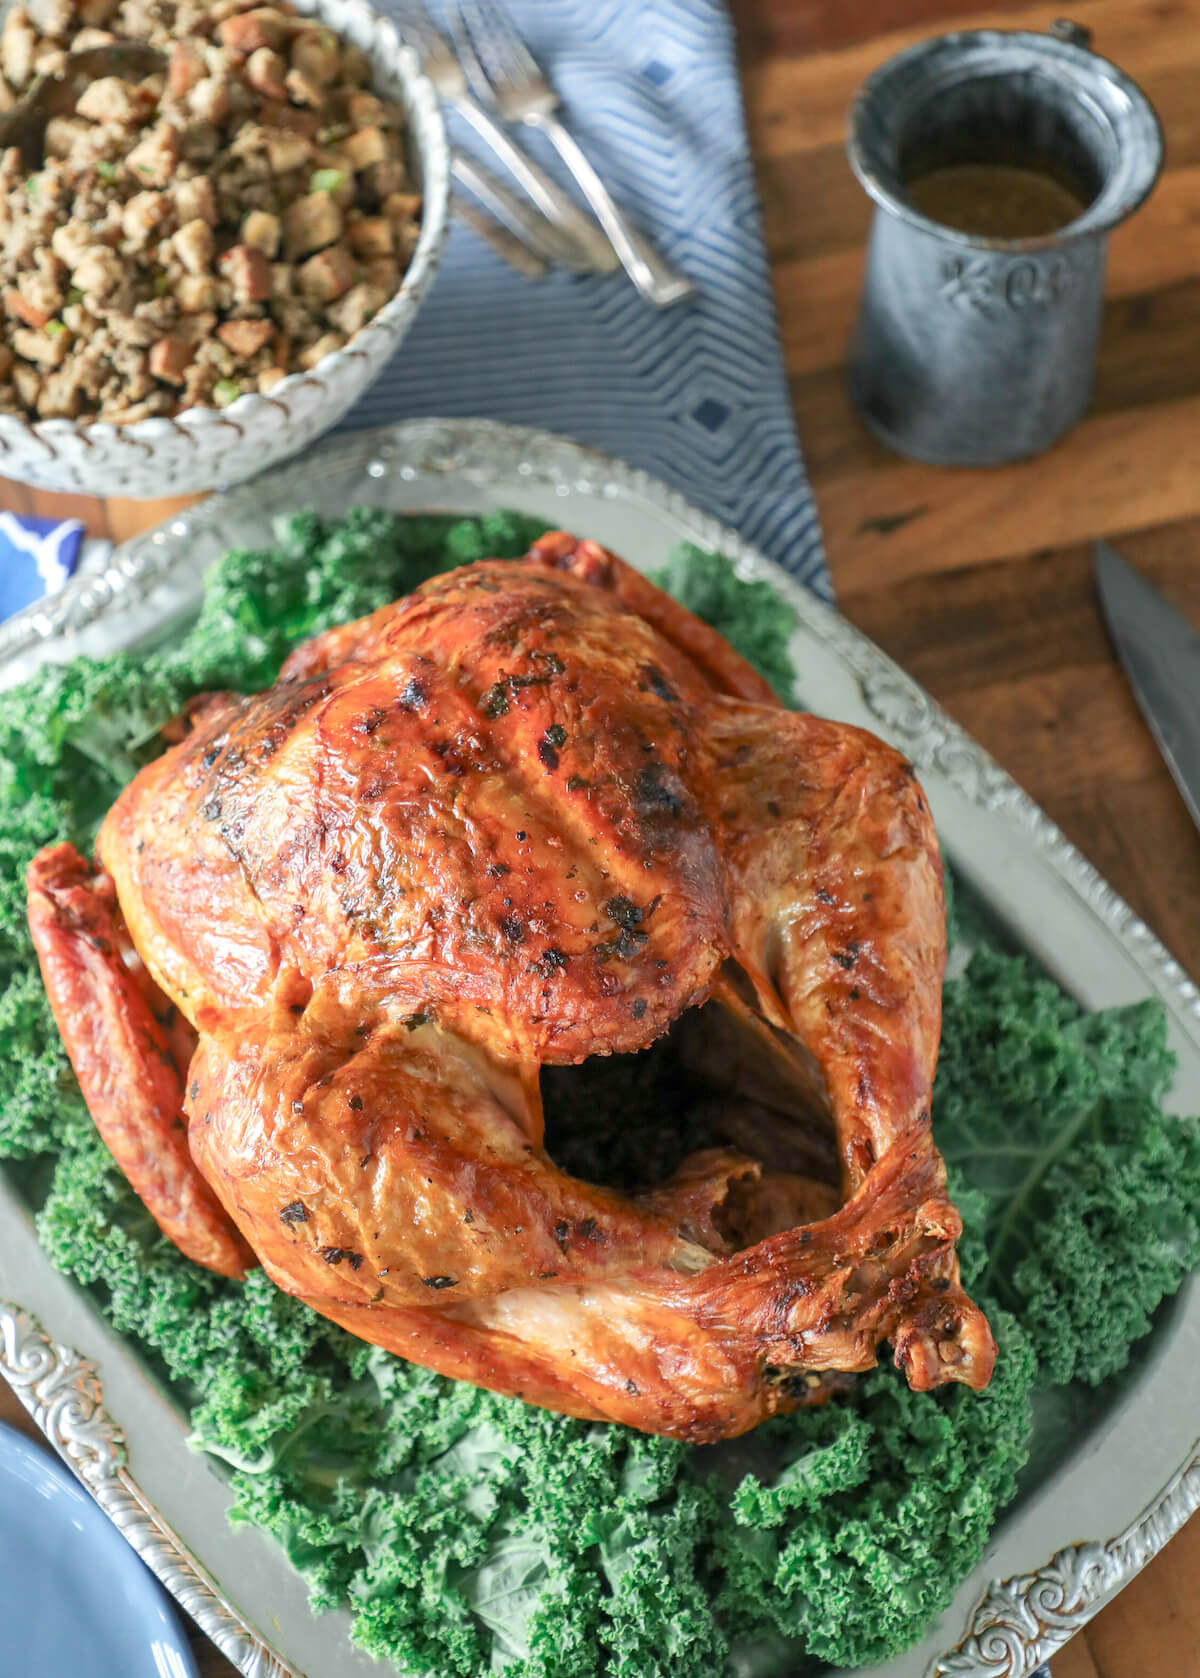
If you’re looking for a foolproof turkey recipe, look no further than this Easy Keto Roasted Turkey with Herb Butter! No poultry PHD required to execute this no fail turkey masterpiece!! Low carb and gluten free.
This is an update of my most popular keto roasted turkey recipe from waaaaaay back in 2012!! It’s been featured many times online and in print magazines since then, and is still a fan favorite here on IBIH.
I’ve spruced this Easy Keto Roasted Turkey with Herb Butter recipe up with new photos and some tips for making the best keto turkey every time.

Sooooo, let’s talk turkey!
It’s one of those meals that almost everybody loves, but that most people are terrified to make. If you are one of them, don’t feel too bad about it – the prospect of roasting a perfect keto turkey inspires fear in the hearts of many.
Because let’s face it, you never just make turkey for you – it’s the kind of thing you invite friends and family over for. So there is always an audience, and that results in major performance anxiety.
It doesn’t help that beautifully golden brown and perfectly trussed turkeys are gracing the cover of every food magazine, blog and cooking channel program right now. It’s a lot of pressure!!!!!
That’s why there are thousands of recipes, websites, and even telephone hotlines dedicated to techniques for preparing this king of poultry.
Should your turkey be fresh or frozen? Do you need to brine your turkey before roasting – or not? Does your turkey have to be organic to taste good? Is the best keto turkey deep fried, smoked or roasted?
Inject or rub? Tent with foil or no? High heat or low????
GAH! Too many choices STRESSES ME OUT!!!
So I decided to rebel against the notion that you need a PHD in poultry to turn out a juicy, delicious bird, and just keep it simple for this Easy Keto Roasted Turkey with Herb Butter Recipe.
It’s not complicated, it’s not difficult, and it takes less time than you might think.
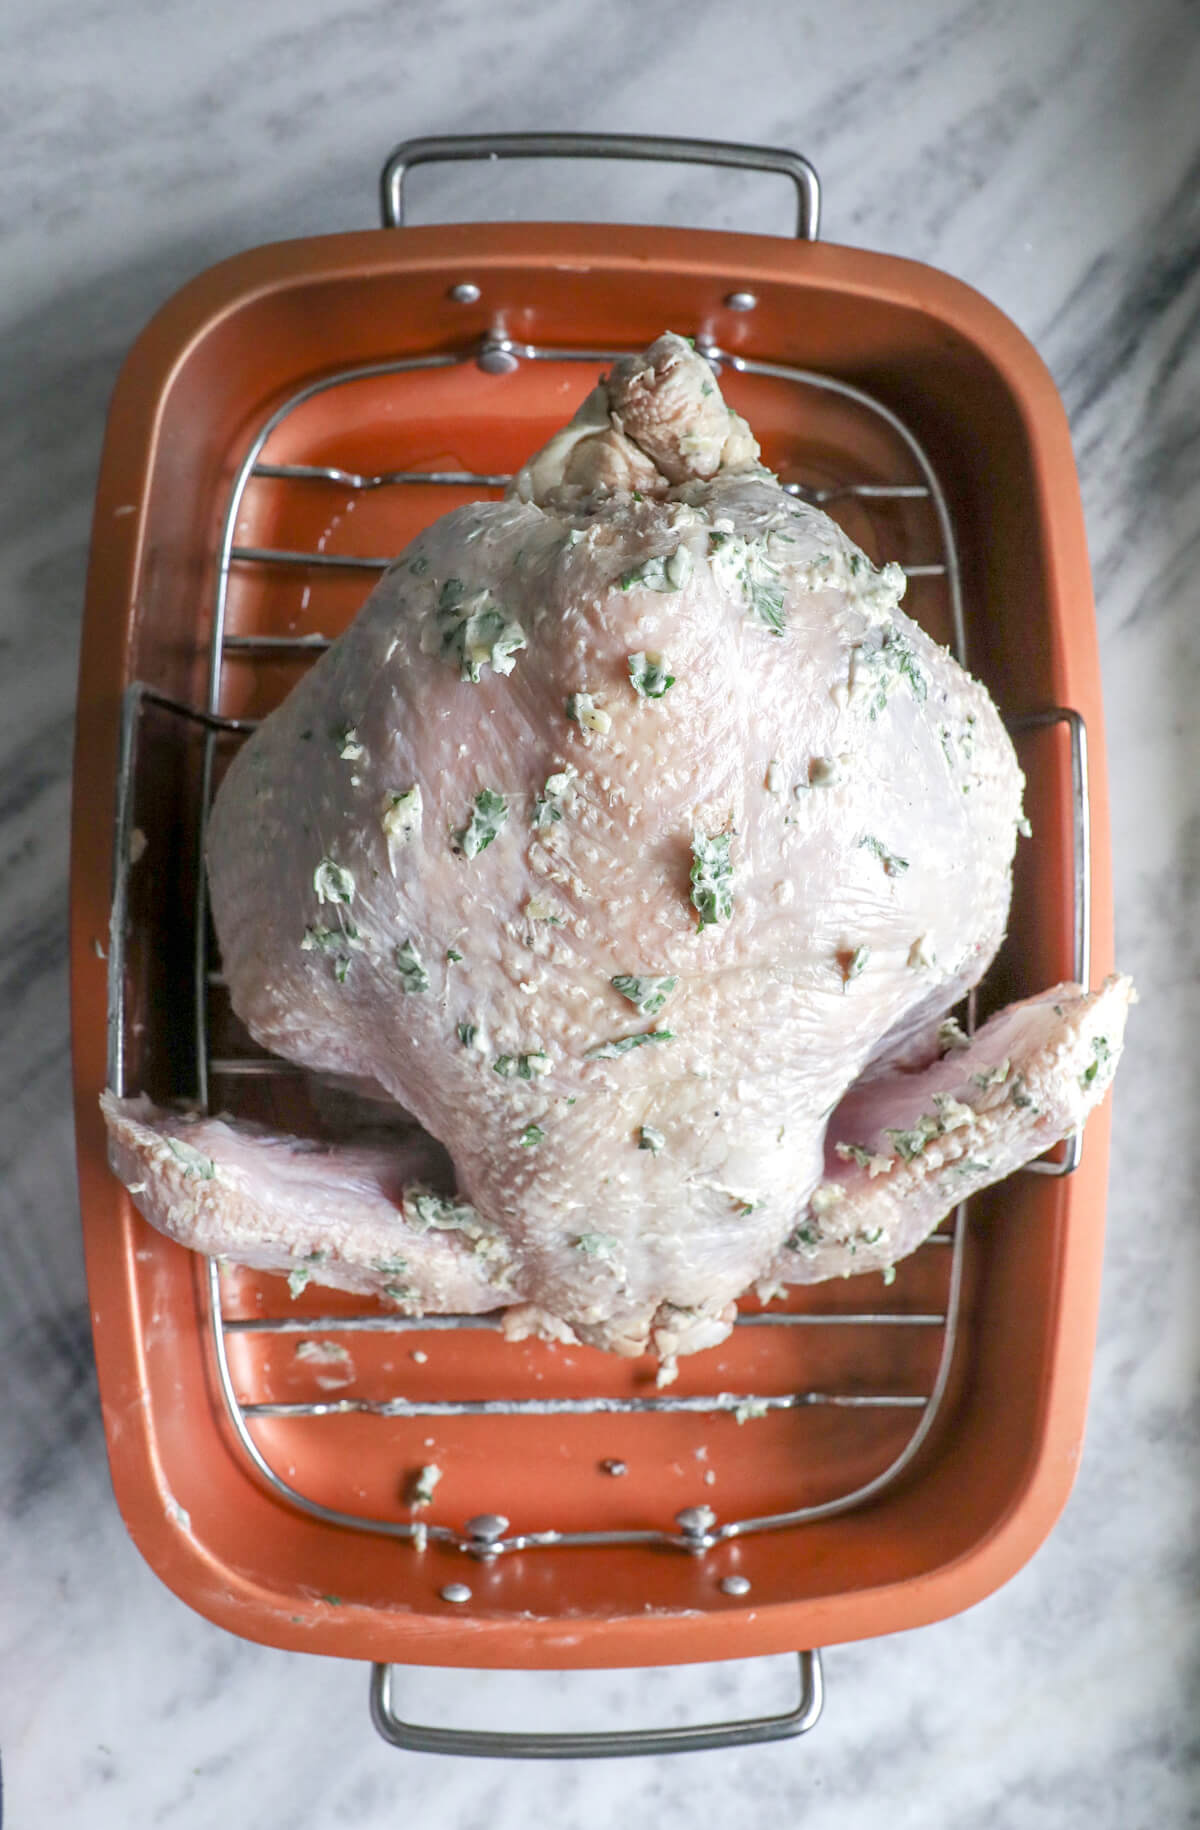
I rub a sage and parsley butter under the skin, throw in some quartered lemons and apples to flavor the pan juices, and roast it at high heat to keep it juicy and tender.
The key to a perfectly roasted turkey for me is to roast it upside down. Yes you read that right, I roast this Easy Keto Roasted Turkey for an hour breast-side down, THEN I flip it and roast it upright for another hour or so until it’s done.
I’ll grant you, it looks a little strange….
After the first hour of roasting it will be golden brown on the underside…
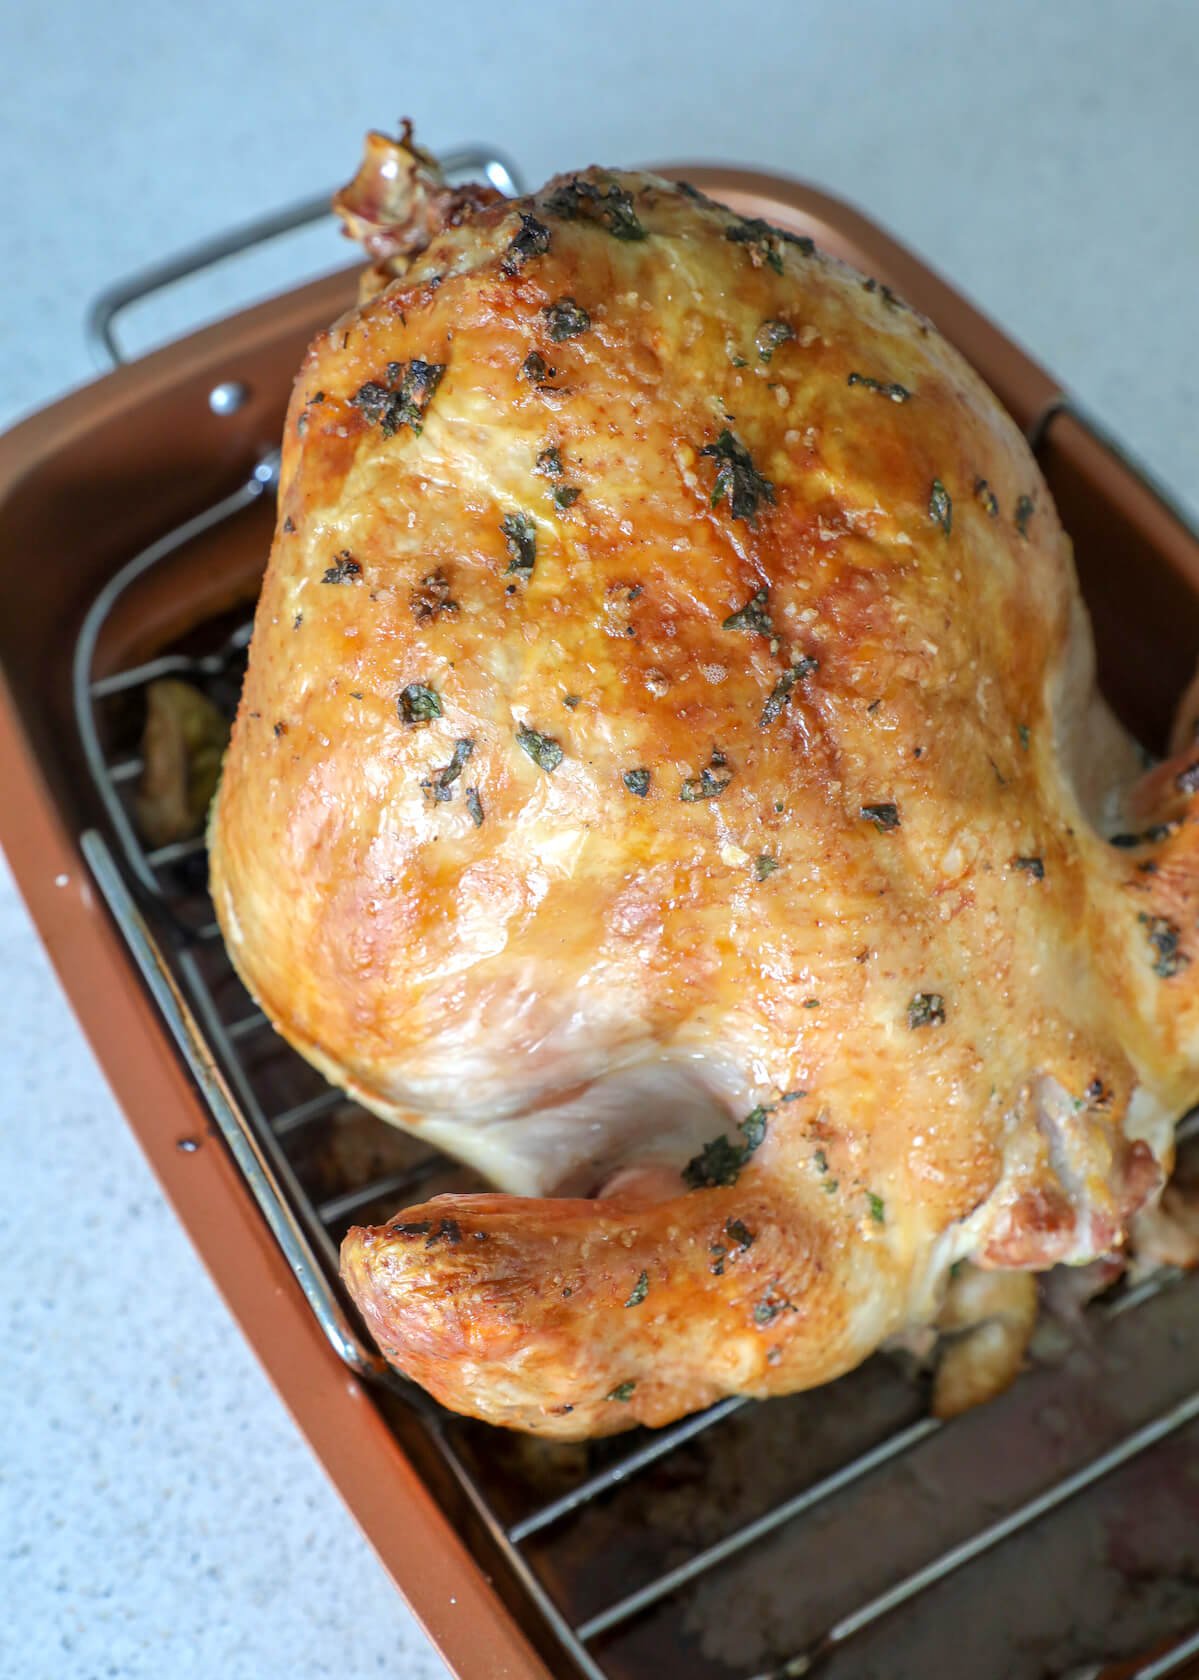
Carefully flip your turkey over so it’s breast side up…
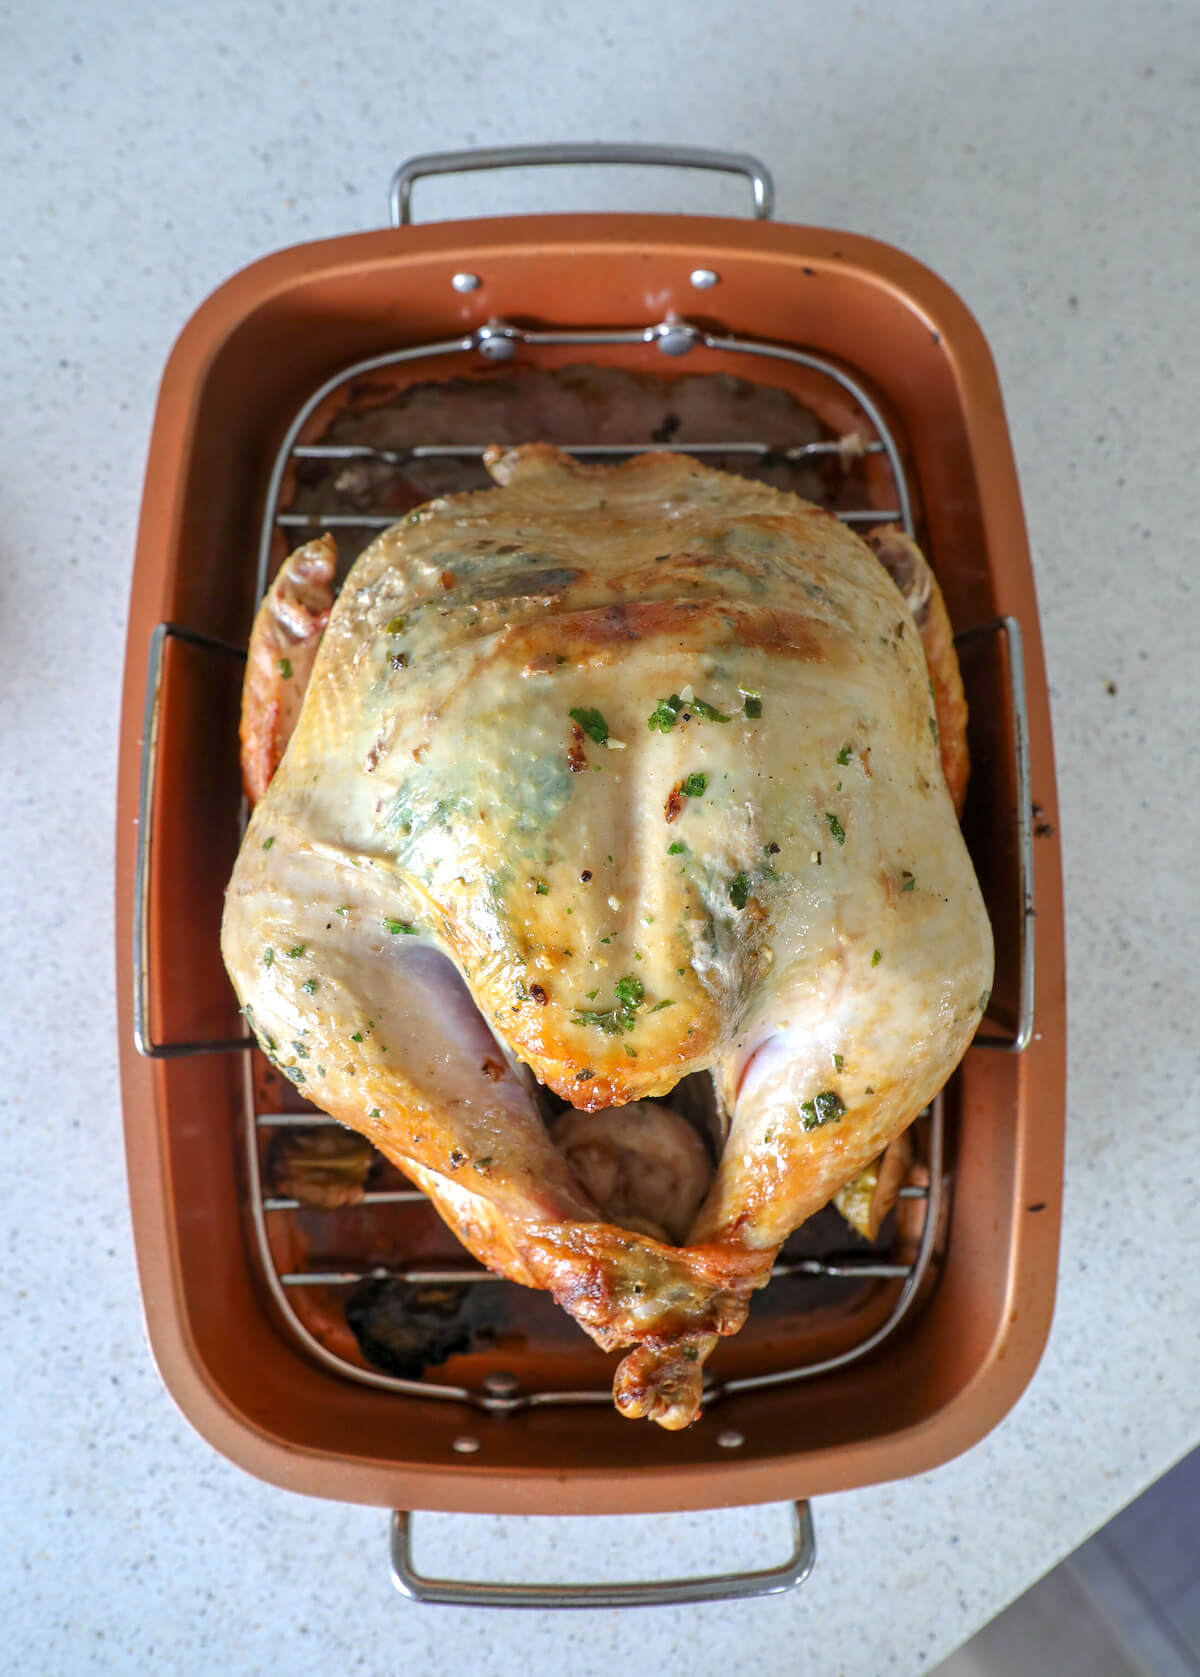
And then back into the oven for at least an hour (see instructions by weight,) and your easy keto roasted turkey comes out of the oven golden brown and super juicy.
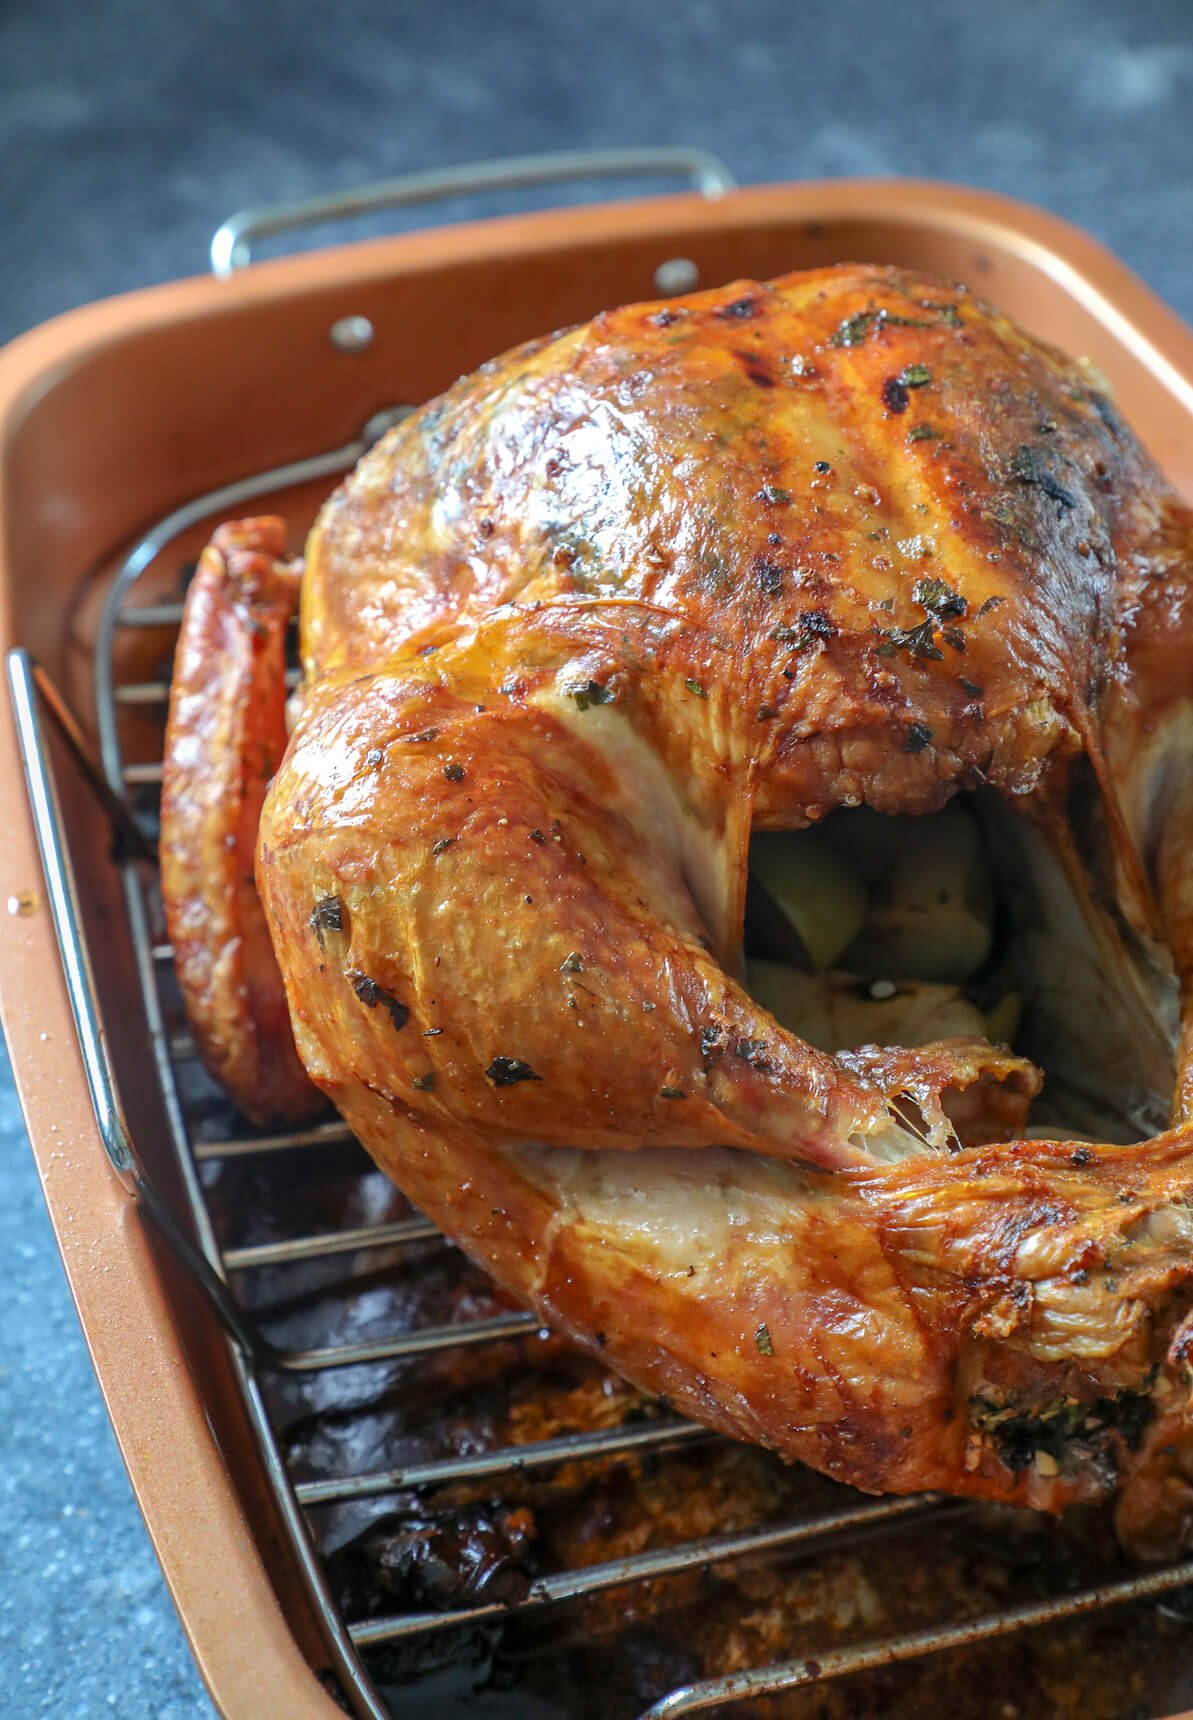
I roasted this 13 lb. bird in just over two hours at 400 degrees and it turned out perfect. The high heat keeps it from drying out, so when I poured the pan juices into a measuring cup to make the gravy there was only one and a half cups of it – that’s because most of it stayed in the bird, which is exactly where you want it.
While a roasting pan with a rack insert isn’t absolutely necessary for executing this recipe, it is helpful to keep the turkey off the bottom of the pan so you get crispy golden skin all the way around.
A roasting rack also prevents the turkey from sticking to the bottom during the first hour of roasting breast-side down so that the skin doesn’t tear when you flip it over. It’s not the end of the world if it does tear, but it’s a lot prettier and more impressive when it stays intact!
You can buy an inexpensive roasting pan with a rack in pretty much any home store, and since it isn’t something you’ll likely use all the time, there’s really no need to invest in a really expensive one. A roasting pan like this one is economical and will work just fine.
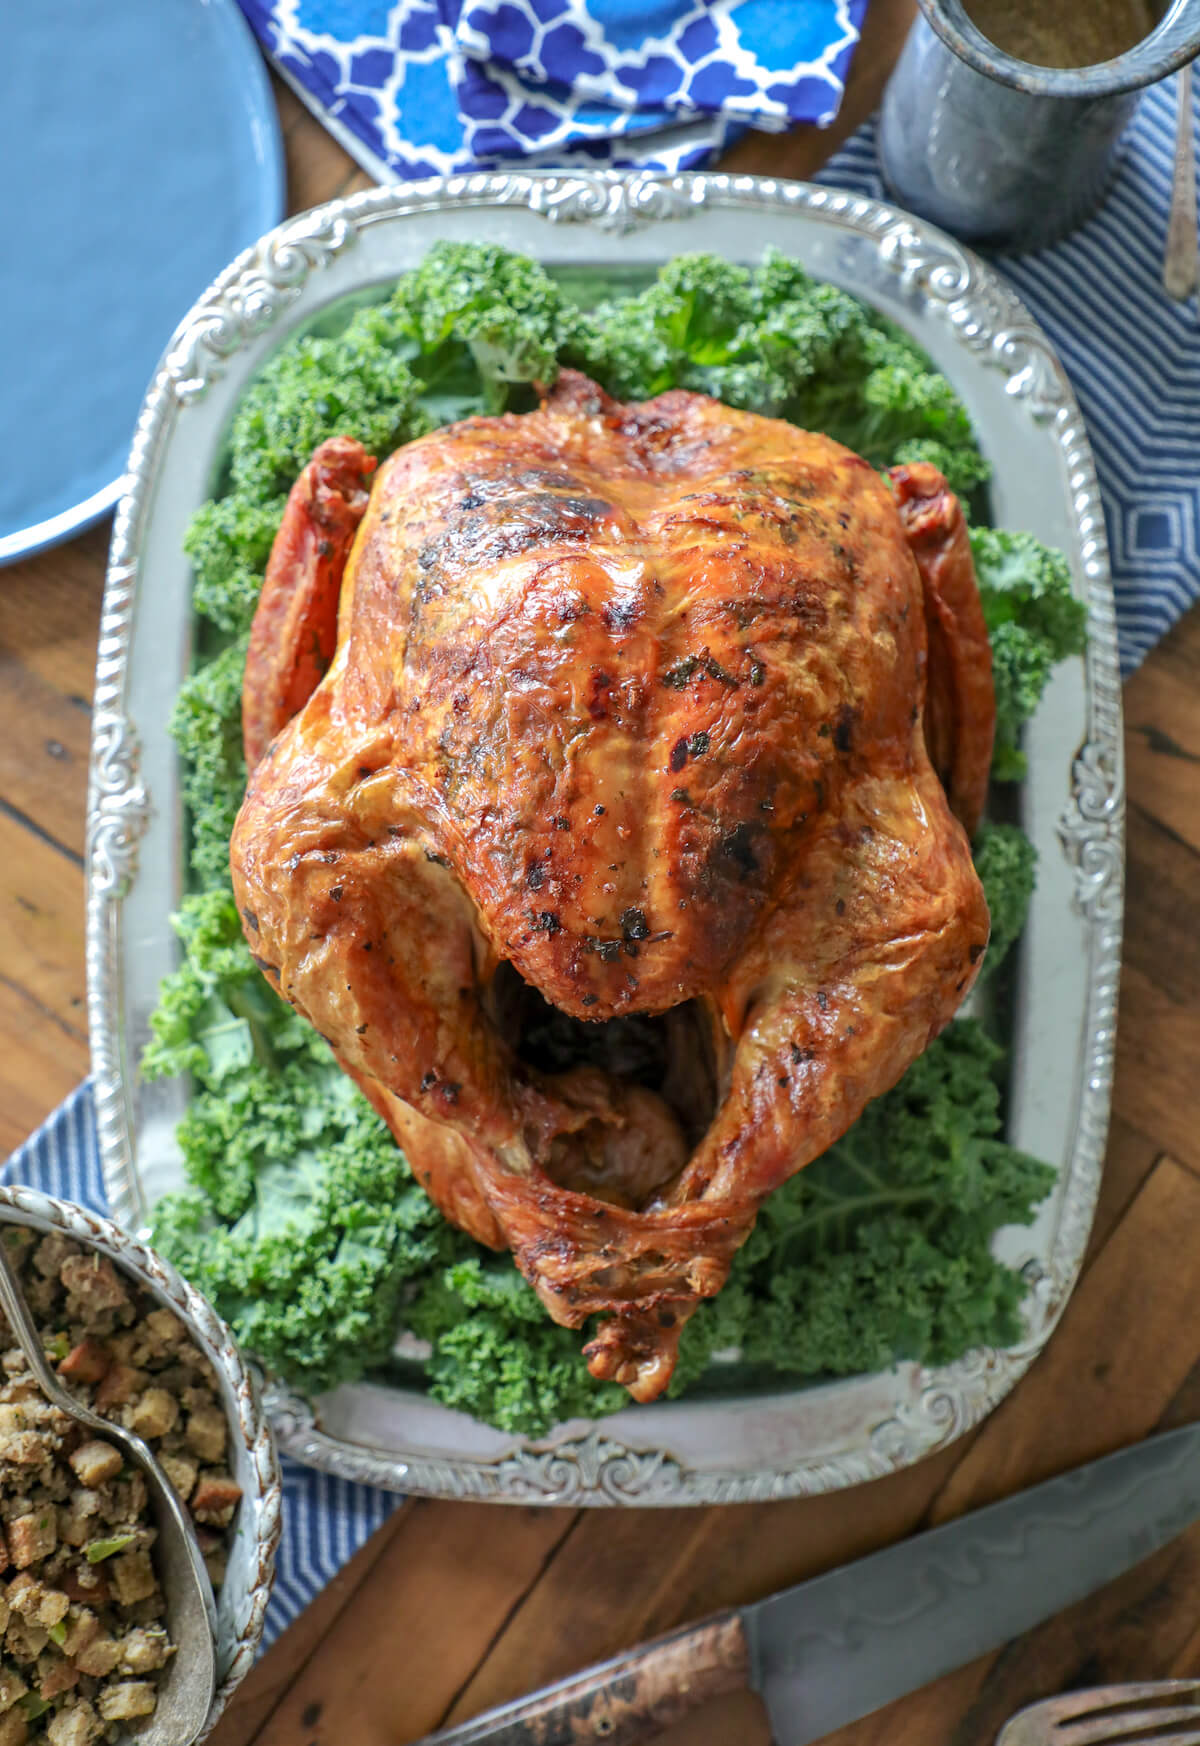
As important as it is to roast your turkey correctly, it’s JUST as important to let your bird “rest” for AT LEAST half an hour after taking it out of the oven before you even THINK about cutting into it. That little break cools the bird slightly, and keeps the juices from running out onto your cutting board during carving – leaving you (and your guests) with dry, flavorless meat.
But that won’t happen to you my friend, because you are armed with this foolproof Easy Keto Roasted Turkey recipe! Now you’re ready to go make the best turkey of your life, and I couldn’t be more excited for you!
If you need some tasty keto side dishes to go with your Easy Keto Roasted Turkey, here is a list of some of my current favorites:
Brussels Sprouts & Radicchio Gratin
Creamed Kale with Bacon and Walnuts
And of course, you’ll need dessert! If you’re more of a traditionalist, I recommend my pumpkin slab pie with candied pecans, or if you want a real show stopper, my keto cranberry orange cheesecake is always a hit!
Print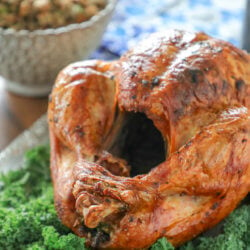
Easy Keto Roasted Turkey with Herb Butter
- Total Time: 2 hours 38 minutes
- Yield: 15 servings 1x
- Diet: Diabetic
Description
If you’re looking for a foolproof Keto turkey recipe, look no further than this Easy Keto Roasted Turkey with Herb Butter! No poultry PHD required!
Ingredients
- 12 – 14 lb turkey
- 1/2 cup butter (1 stick), softened
- 2 Tablespoons fresh sage, minced
- 2 Tablespoons fresh parsley, chopped
- 2 Tablespoons fresh garlic, minced
- 1 Tablespoon kosher salt
- 1 teaspoon freshly ground pepper
- 1 lemon, quartered
- 2 small apples, quartered
- 1 cup of water for the pan
For the gravy (in addition to pan juices):
- 1/2 cup water
- 1/2 teaspoon xanthan gum (to thicken)
Instructions
- Preheat your oven to 400 degrees (F) and adjust your racks to fit the turkey into it.
- Remove the neck and giblets from the turkey and rinse the bird inside and out. Pat dry.
- Combine the softened butter, sage, parsley, garlic, salt and butter in a small bowl, mixing well to combine.
- Starting from the back of the bird, slide your fingers between the skin and breast meat, opening a cavity that extends all the way to the front and along the sides of the breast.
- Push the flavored butter under the skin, covering all of the meat. Do the same with the tops of the drumsticks, being careful not to pierce the skin. This is no time to be squeamish – roll up your sleeves and get in there with your fist full of butter! Then rub the remaining butter over the rest of the skin of the turkey, top and bottom.
- Stuff the quartered lemons and apples into the cavity of the bird. If they don’t all fit, throw the rest into your roasting pan.
- Pour the water into the bottom of the pan to prevent scorching.
- Place the bird UPSIDE DOWN onto the rack of the roasting pan – this protects the breast and keeps it from drying out.
- Roast uncovered at 400 degrees for one hour.
- Remove from the oven and turn the bird over carefully – I used a clean dish towel which allowed to me to get a good grip on it so it didn’t slide around.
- Roast the turkey right side up (again, uncovered) for another 6 minutes per pound – so for a 13 pound turkey it would be another 78 minutes.
- Test with a meat thermometer for 165 degrees at the thickest part of the thigh. If not quite there, give it another 15 minutes and test it again.
- Remove from the oven and let it rest – preferably for an hour if you can.
- While the turkey is resting, pour the pan juices into a measuring cup. Skim off 90% of the fat and then add the 1/2 cup of water and xanthan gum.
- Puree in a blender or magic bullet and re-heat just before serving.
Notes
The nutrition information will vary quite a bit depending on what part of the bird you are eating. I’ve provided approximate nutrition info for breast meat with gravy – assume if you’re eating dark meat that the fat and calories will be higher, but the protein and carbs should be about the same.
- Prep Time: 20 minutes
- Cook Time: 138 minutes
- Category: Keto Main Dish
- Method: Roasting
- Cuisine: American
Nutrition
- Serving Size: 4 oz turkey, 2 Tbsp gravy
- Calories: 276
- Fat: 11g
- Carbohydrates: 0g
- Fiber: 0g
- Protein: 34g


Allison says
Turned out perfect! Love that hint of sweet from the apples, adds a new layer to the typical Turkey I make.
Leigh Ann says
I can’t wait to try this! It looks amazing!
Mellissa Sevigny says
I’m pretty sure this was a grocery store turkey Amy, not sure of the brand as it was a few years ago back in South Carolina!
Cat says
Covered or uncovered
Thanks
Karin says
This looks delicious…AND easy! Do you think I could replace the butter with coconut oil (or something else) for a dairy free option?
Mellissa Sevigny says
Definitely Karin! Just add a little extra salt!
Karin says
Thank you so much for your reply! And for suggesting the extra salt…You know, living in Europe, I wouldn’t even have thought of butter containing salt, but yours probably does!
Amy says
I love the idea of blending the gravy! I did this last year, but used the onions that I stuffed the turkey with to make it thick. It worked wonderfully and was so delicious. I would love to cook my turkey this year like your method and add the fruit. Could I still add the onions and use to thicken the gravy or do you think the onions will overpower the apples and lemon? I prefer not to use xantham gum. Thank you!
Farah says
Melissa what sort of apples would you recommend? Honeycrisp, Fuji, Red Delicious, etc?
Mellissa Sevigny says
For this recipe it doesn’t really matter Farah – they simply release their juice into the pan gravy and add a subtle sweetness so pretty much any apple will do!
Catherine Manna says
How much more min for 17 pound Turkey
Stephanie says
Looks gorgeous Mellissa! Do you think this would work with a 7 lb turkey breast? If so, can you advise on the cooking times? I appreciate it!!!
Mellissa Sevigny says
Thanks Stephanie! I could really only guess at a turkey breast at such a high heat. I would think it would take about an hour to an hour and a half, but you should start testing the internal temp with a thermometer at 45 minutes just to be sure!
Rebecca says
Melissa, do you baste the turkey while it is cooking or does the upside cooking technique help? I’ve always placed apples and onion inside the cavity and slathered it with a butter and olive oil mixture and then topped with my seasoning. Never thought to season the butter! Thanks again for such a great looking bird! Here is to you and your family a Happy Thanksgiving!
Mellissa Sevigny says
Honestly I don’t usually – since you do it upside down and then just flip it at the end, it’s almost self basting. But if you wanted to you certainly could – I’m sure it wouldn’t hurt! Enjoy!
djjajk says
Rubbing the bird was not my favorite part of this process, i’m very squeamish! I had to have my bf help with the removal of the cavity and all of the insides. Anyway, my favorite part was eating it! This was the first time making a turkey and your recipe seemed the most first timer friendly. It was delicous. My bf was worried that it was going to be dry, but not I, I was blindly trusting the apples and lemon and the mixture. Needless to say, it was a definite success in our house, the kids loved it, the bf and I loved it, which means that this will be my go to recipe every year. Thanks so much for sharing it.
Rebecca Hansen says
How long do you think an 18lb bird would need at 400 degrees?
Mellissa Sevigny says
I would recommend increasing the upside down time to 90 minutes and then an hour and 15 minutes right side up. Test with a meat thermometer (or keep- checking the handy pop-up thingy if your turkey has one) every 10 minutes until it gets to 165 degrees. Then let that sucker rest for AT LEAST 30 minutes before cutting into it. Hope this helps!
Leah says
OK So I have everything for this but the fresh sage. Do you think dried sage would work OK?
Mellissa Sevigny says
Slightly different flavor but yes, it will definitely work!
Sonia! The Healthy Foodie says
Gorgeous looking bird, Mellissa. I’d hire you to cook mine anytime! ;)
Mellissa Sevigny says
Ha ha! Thanks Sonia, I’d take your money anytime! :)
CJ - Food Stories says
Wow … Your bird looks so professional :-)
Mellissa Sevigny says
Thanks CJ!