
This delicious Bacon Wrapped Jalapeño Popper Stuffed Meatloaf boasts a tasty ground pork layer, wrapped around an impossibly creamy and cheesy filling that is studded with spicy chunks of jalapeño. This porcine masterpiece is then swaddled in bacon and baked until crispy on the outside and melt in your mouth tender on the inside.

This Bacon Wrapped Jalapeño Popper Stuffed Meatloaf is a cheesy, porky wonderland and should come with a warning label. HIGHLY ADDICTING. PROCEED WITH CAUTION.
The good news is that this pork meatloaf recipe is totally low carb friendly. Nobody will believe that you’re actually on a diet when they see (or taste if you’re into sharing) this gorgeous celebration of pork and cheese. #ketoforthewin ?
While it may seem complicated, don’t be intimidated – this Bacon Wrapped Jalapeño Popper Stuffed Meatloaf is surprisingly easy to make! You just season your meat mixture, pat it out into a rectangle on some cling wrap, spread the popper filling over it and roll it up. Then wrap your bacon around it from the top and secure it with toothpicks. Bake, remove toothpicks, slice and serve.
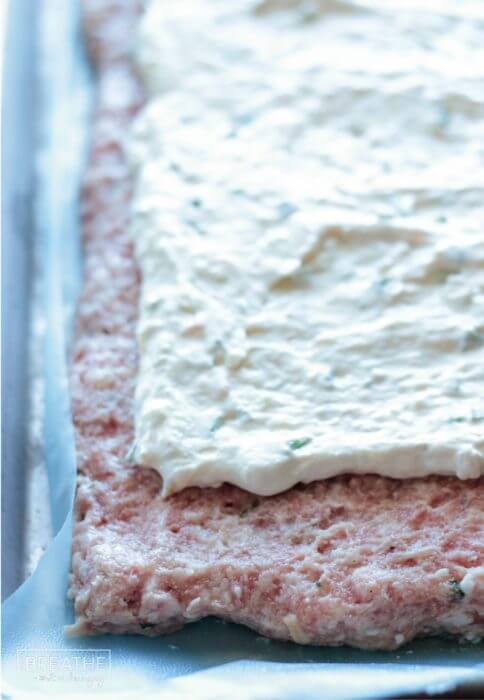
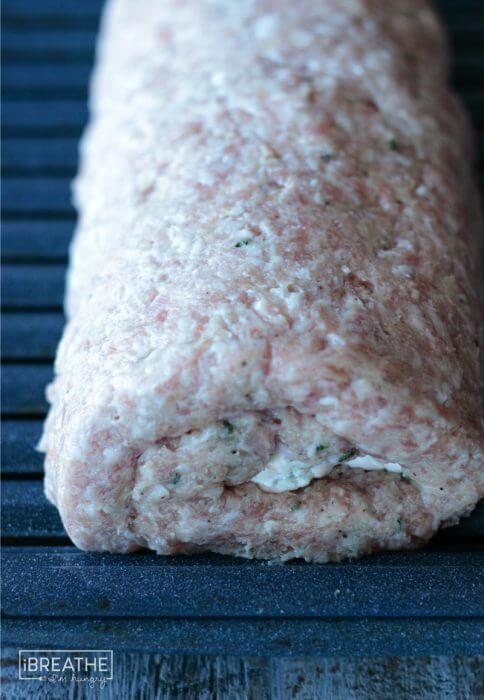
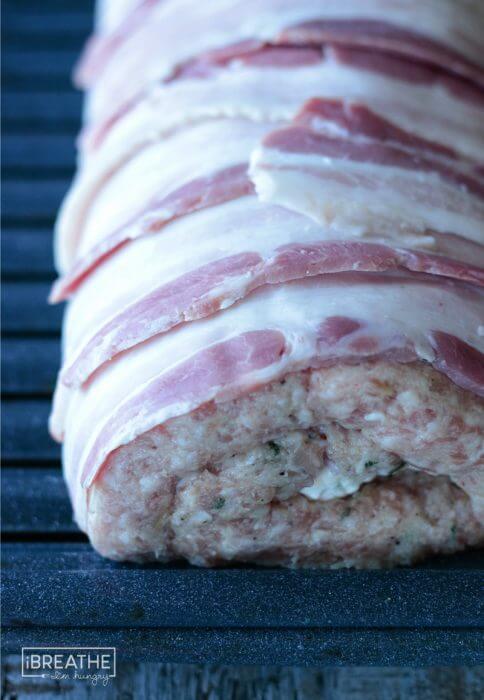
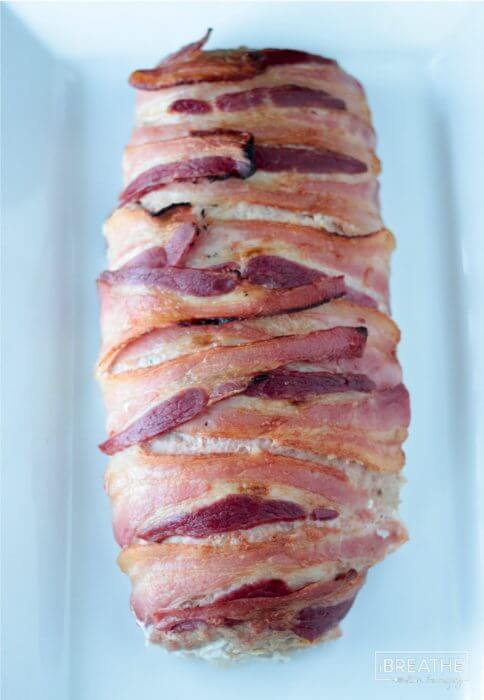
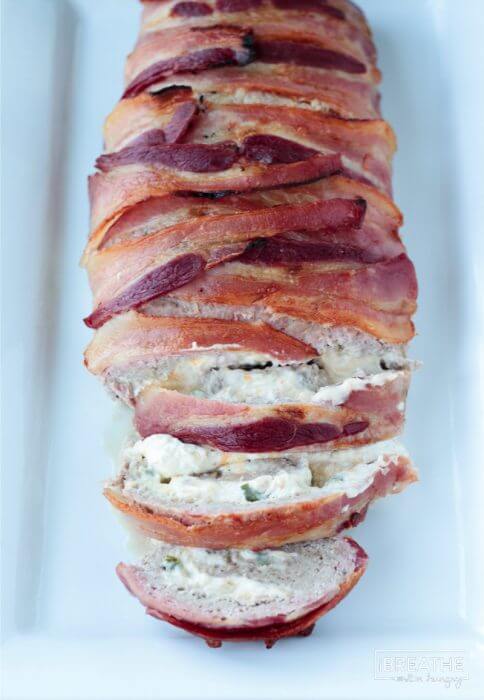
It really is THAT easy!
The hardest part is waiting for it to cool before slicing! You’ll want to tear into it immediately, but if you slice it while too hot all of that delicious cheese will run out. So give it about 15 minutes to allow it to set before you cut into it.
I promise that it will be worth the wait!
Side note, you may also want to check it with a meat thermometer before slicing, since ovens and meatloaf thickness may vary. It should read 160 degrees to be sure it’s cooked all the way through!
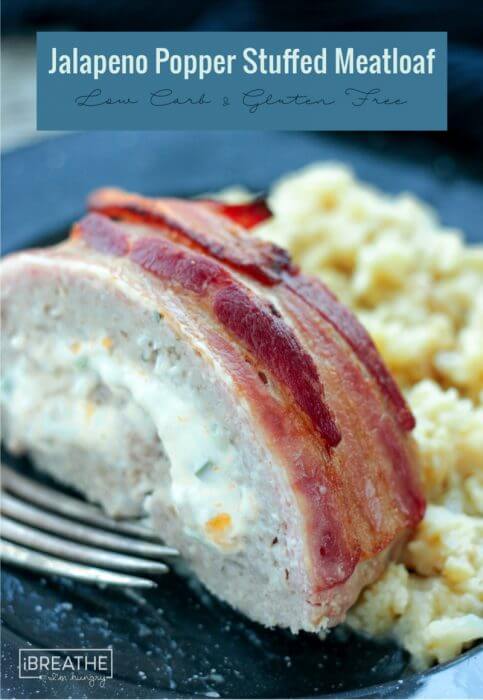
The Bacon Wrapped Jalapeño Popper Stuffed Meatloaf is shown in the photo above served with my Easy Cauliflower Gratin recipe which went perfectly, but this would also go great with my Better than Potatoes Cauliflower Puree or the Easy Zucchini Gratin that I just posted the other day.
If you’re burnt out on cheese (as if) you could also pair this with the less heavy Roasted Moroccan Green Beans and/or my Pan Roasted Radishes and a side salad.
No matter how you eat this, it’s going to be a huge hit with the entire family! It’s also impressive enough to serve to guests, and it reheats really well if you want to make it ahead and have lunches ready to go for the rest of the week!
I really can’t say enough about what a winner this Bacon Wrapped Jalapeño Popper Stuffed Meatloaf is – I know you guys are going to love it so be sure to make it ASAP and then report back!
Bacon Wrapped Jalapeño Popper Stuffed Meatloaf
- Yield: 12 servings 1x
Description
This delicious Bacon Wrapped Jalapeño Popper Stuffed Meatloaf is perfect for family, friends, or just make it for yourself and have lunch ready to reheat all week! Keto, Atkins and Low Carb friendly!
Ingredients
For the meatloaf mixture:
- 3 lbs ground pork
- 3 eggs
- 1 cup almond flour **
- 3/4 T kosher salt
- 1/2 tsp ground black pepper
- 1 tsp garlic powder
- 1 Tbsp dried onion flakes
- 1 Tbsp dried parsley
- 1 lb thinly sliced bacon (to wrap)
For the filling:
- 16 oz cream cheese, softened
- 1/2 cup shredded cheddar cheese
- 1/2 cup shredded pepper jack cheese
- 1/3 cup fresh jalapeño, chopped
- 1/4 cup salsa verde (green tomatillo salsa)
Instructions
- Combine the pork, eggs, almond flour, salt, pepper, garlic powder, onion flakes and dried parsley in a large bowl and mix well with your hands.
- Press the mixture evenly onto a parchment or plastic wrap lined cookie sheet to about 1 inch thick and approximately 15 x 10 inches wide and long.
- Combine the filling ingredients in a medium sized bowl and stir until well combined and smooth.
- Spread the filling mixture over the meat and leave a 1 inch gap of meat on three sides, and a 2 inch gap at the end where you will make the bottom seam. (see the photos above)
- Chill in the fridge for 30 minutes.
- Preheat the oven to 400 degrees.
- Use the edges of the wrap to pull up and roll the meat mixture towards the side that has the 2 inches of meat past the cream cheese.
- Don’t roll the wrap into the meatloaf, just keep rolling away from you and pulling the wrap up as you go.
- When you get to the end, pull the wrap all the way out from the bottom of the roll and discard.
- Pat the meat firmly into an even roll shape and down to seal the bottom, being careful not to squeeze the filling out.
- Starting on one end, drape your bacon over the top and tuck under, creating overlapping ribbons of bacon all the way down the roll.
- Secure the bacon with toothpicks on both sides.
- Bake the meatloaf at 400 degrees for 60 minutes or until a meat thermometer in the center reads 160 degrees. If your bacon hasn’t crisped up by the end of that time, finish it in the broiler for 2 – 4 minutes. Watch it carefully so it doesn’t burn though!
- Remove from the oven and let it rest for about 15 minutes.
- Carefully extract all of the toothpicks and then slice into 1 inch thick pieces to serve.
Notes
**To see the brands that I use and recommend, check out the IBIH Pantry Page!
To ensure that your meat has cooked through, I recommend checking with a meat thermometer in the center of the roll – it should read 160 degrees in the center when you remove it from the oven.
- Category: Low Carb Main Dish Recipe
- Cuisine: American
Nutrition
- Serving Size: 1 inch slice
- Calories: 461
- Fat: 37
- Carbohydrates: 2g net
- Protein: 28
Had a little too much fun and need to drop some pounds? Get started today with my free low carb and keto menu plans to kick start your weight loss in 2017!

Can’t get enough delicious low carb recipes? Download all five of my e-cookbooks (over 150 delicious low carb recipes) for just $19.99 for a limited time!








adriana says
Im so glad you posted this recipe,looks so delicious.
Angela Vance says
LOVE, LOVE, LOVE this recipe! I will ensure I close up the seams on the end to prevent the cream cheese from escaping, cook about 10 minutes longer (as I still had a few raw spots in the center), and definitely add more jalapeno! Even the kiddos enjoyed it. I call that a WIN and will be adding it to my collection. Thanks, Mellissa!
Shadow says
Not to be a stickler (though watch, I’m going to be) but I think step one should be before step 7. Because otherwise you’re preheating your oven and then waiting 30 minutes while it chills in the fridge. I think preheating once it’s out of the fridge would work better. There should still be plenty of time to preheat while rolling and wrapping in bacon.
I’m the kind of person who either follows a recipe letter for letter or I disregard most of it and make stuff up. But with your amazing recipes I tend to be the former and I know when I go to make this and I realize I have to wait half an hour I’m either going to skip it and risk rolling it out then or sigh and turn my oven off. I hate wasting power.
Mellissa Sevigny says
This is a legit observation – thank you! I will make that adjustment. You know, it’s funny because I only recently started adding the preheat the oven at all because I figured everybody obviously knows to do that. But then I get people emailing me that a recipe was raw and I found out that they didn’t know to preheat the oven, so I started adding it in. And now this happens lol! WHY IS LIFE SO COMPLICATED?!?!? ?
Laura B. says
I made this and it was really delicious. Thank you!
LisaM says
I’m gonna have to ask DH to make this. I love the jalapeno popper fritata – so much so even I cook it!
Chantale says
Hi! I tried this recipe yesterday and it failed. Which side are we suppose to start rolling? I started rolling on the 10 inch side, but it was so huge, 50 minutes in the oven wasn’t enough. The center wasn’t cooked.
Mellissa Sevigny says
Not sure why it was so thick for you – I’ll put a note in to use a meat thermometer to check it so people can add more cooking time if necessary! Thanks for the feedback, sorry you had issues with it!
Tara says
We made this tonight with 1 lb ground breakfast sausage and 2 lbs ground venison. It’s what we had on hand! It was amazing! One bite and my kids said they were going to need second helpings. My question is, can this be done in a crock pot and how long do you think it needs? In the oven this took about an hour and a half to reach 160 degrees in the middle.
Mellissa Sevigny says
The bacon won’t get crispy in the crock pot but I suppose it could work. Probably about 4 hours on low would do it!
Crystal says
This looks amazing (as most your recipes do) but two questions. Would it work if I cute this recipe in half and only made half as much ? What about freezing it would this stay good after being frozen for another time ?
Mellissa Sevigny says
Yes you can cut it in half and make a smaller version – and technically there is no reason it couldn’t be frozen and reheated with good results!
Theresa says
Tried it tonight, and it is Delish! One thing I’d stress is REALLY seal those ends well. I didn’t do a good job, and had a cream cheese volcano out of one end. Salvaged it by scooping the overflow onto the slices like a side sauce, and all tasted amazing.
Lauren says
I’m making this tonight. I am so excited.